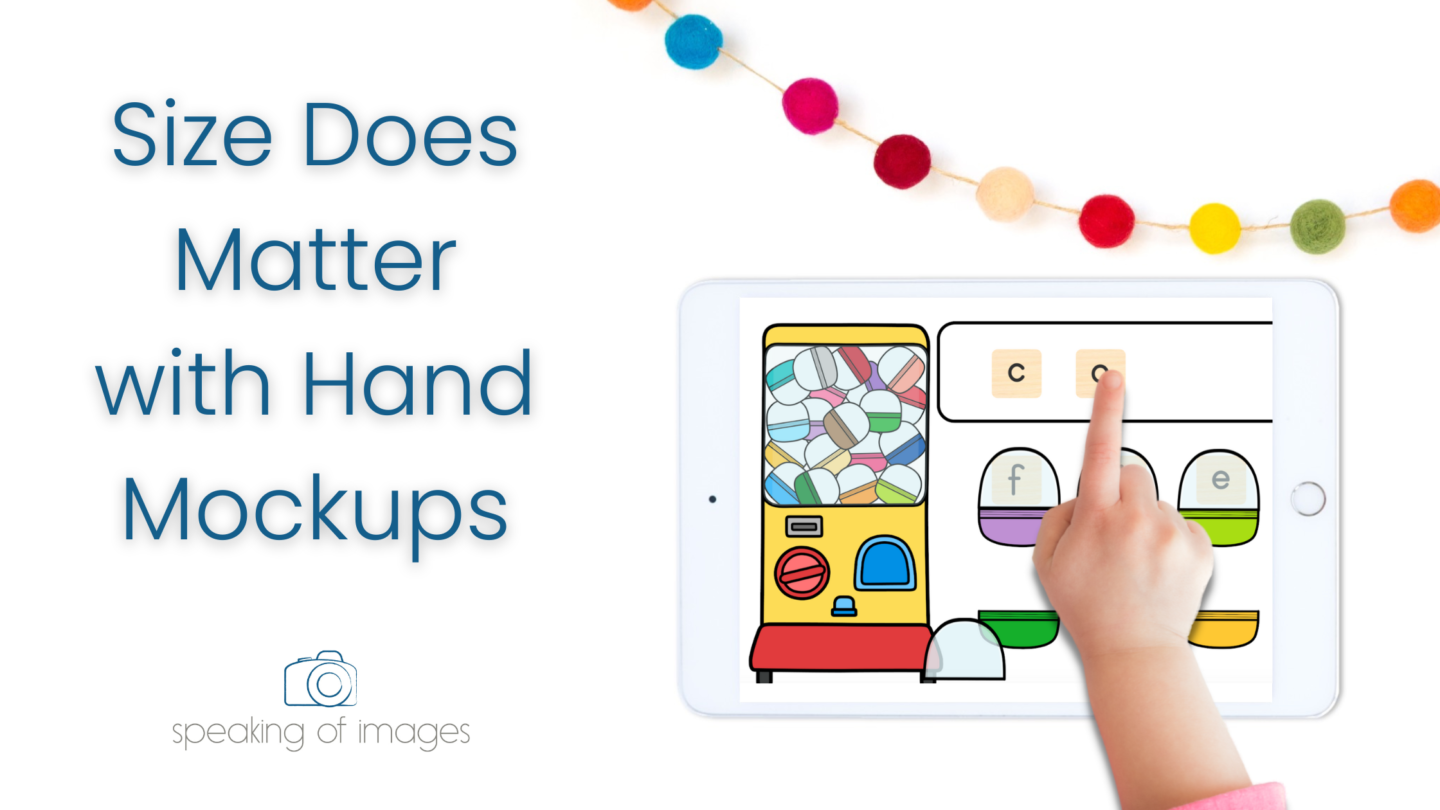
Showing your product in use is a great way to help buyers imagine how they might use the product in their classroom. But taking pictures of your actual students in the classroom is rarely a good idea. That’s where hand mockups come into play. Today we are going to tackle must-do tips to make your hand mockups look realistic.

Why Use Moveable Hand Mockups?
Taking in-action photos of your educational resources is not always possible. Even if you are still teaching in the classroom, using your students in your photos is not always a good idea. It is best practice to have a signed model release for any child that you might be featuring in your image–even if it is the back of their head or their hands. I always say that if a parent could recognize their child in an image, there should be a signed release.

And. . . even if you do take in-use shots in your classroom, it can be really hard to get just the right angle without having your students pose.
So what’s another way to show your product in use?
Moveable Hand Images.
What is a Hand Mockup?
A hand mockup is a picture of a hand with a transparent background. These moveable images allow you to place the hand in a composition that highlights your product. It allows you to create an in-use photo without the need for a live model or the legalities of a signed model release.
Using hand mockups also allows you to create a great mockup photo without drawing all of the visual attention to the hand itself. Instead, your product remains the star of the photo.
How to Use Moveable Hand Mockups?

To create a mocked up in-use photo you will layer images of your product along with the hand image to create a final product that looks like someone was actually interacting with your product.
To make this work in the most realistic way you need to consider two main features:
1. Hand Appearance
The hand image you choose should represent the age of the student that would be using the product. You don’t want a preschooler holding a calculator or an adult hand completing an alphabet activity.
Taking note of details like this can be the difference between your final image looking realistic or fake.
2. Hand Size
When building a mockup with a hand, the hand needs to be sized proportionally to the other objects in the image. In this case, size does matter.
Let’s look at a few examples of how hand mockups can help you create great in-action photos of your resources.
The Action Shot

This young child’s hand is being used to hold a glue bottle. This image is made up of two separate movable pieces: the glue bottle, and the hand. The hand is sized to match how big it would be when a Kindergarten aged child is holding a standard bottle of glue.
Not sure how to get the sizing right? Take a look at the world around you. Pick up a bottle of glue and see just how much your hand covers the bottle – then adjust for a slightly smaller hand.
This is actually a great tip you can use any time you are creating a mockup. To get the most realistic final image make sure to look at the world around you. Adding a pencil on top of a worksheet page? Make sure the pencil proportionally covers the right amount of space. Adding a hand interacting with an iPad? Give it a go in real life to see just how much of the screen is covered by your hand.

In this letter-matching product cover, the same child’s hand image is used, featuring a square card from the mini sensory box.
By turning the hand image you can show a different type of action. Sizing the hand so that it doesn’t look too big or too small when compared to the card, the pencil box, and the image as a whole is key.
The use of the hand in this photo supports the product and shows exactly how students will interact with this resource.
Just remember – your product should always be the star of the image.
Is that a desk or a bulletin board?

Now let’s look at a moveable hand image that doesn’t really work. If this image was in a blog post about students using a number line for subtraction, it makes sense to show a child pointing to a number line. And. . . young students love the scary monster finger pointers, so that works, too.
What doesn’t work is the size of the hand. Looking at the picture, it appears to be a student’s desk. However, based on the size of the hand, the other objects would need to be the size of a bulletin board for this picture to be realistic. It just doesn’t work because the hand is so out of proportion from the rest of the image that it becomes a distraction.
Here is the same cover and hand, in a proportion that fits the image. In this case, the hand compliments the image and draws the viewer’s eye to the topic of the blog: using a number line. The hand is in proper proportion to a typical desk name plate and task cards. Even though the hand is larger, it doesn’t stand out as much because it “fits” the picture.

Create In Use Product Photos with Moveable Hand Mockups
Using moveable hand images can add personality to your product images. They are a great way to give your product photos action and movement.
Just make sure that you follow these simple rules:
- Make sure the appearance of the hand is age appropriate.
- Size matters. Compare the size of the hand to the other objects and make it realistic.
- Make sure the hand image is used in a way that considers the design of the image as a whole. Keep your product as the focus of the picture.
Get Started with Hand Mockups
Are you ready to use hand mockups? Head over to the Image Maker Membership. The membership includes lots of different hand mockups for a variety of ages, actions, and positions.
You can also find some hand mockup images in the Speaking of Images store on TPT.


